
It’s no secret that Pinterest is a great tool for driving traffic to your website. So today, I’m going to show you how to brand your Pinterest Board Covers so that they tie in with your branding and give your user a seamless experience.
Pinterest is a stylish search engine, where beautiful content can be curated. Since Pinterest is a visual platform, taking the time to create a cohesive, branded look for your covers can make a really good impression on your visitors.
How to change your Pinterest board covers
Like all social media platforms, Pinterest changes things up a bit every now and then. They recently changed the sizing for the board covers again.
For those of you that already had your boards set up with branded covers, it’s a little frustrating to have to redo them. If you haven’t set them up yet, I’ll show you the file size I used, the method that worked well for me and how to set them up in your account in 5 simple steps.
1. Create your master file.
I have several master files for all sorts of graphics I need to work on at any given moment. It helps to keep things consistent.
For these Pinterest Board Covers, I found that a file sized at 750px X 800px is the sweet spot. Anything bigger than that is just too big and anything smaller pixelates the image. (I might be a bit pickier than most with pixelation). I prefer using either Illustrator or Photoshop for my graphics. In this case, I used Photoshop for my Pinterest Board Covers.
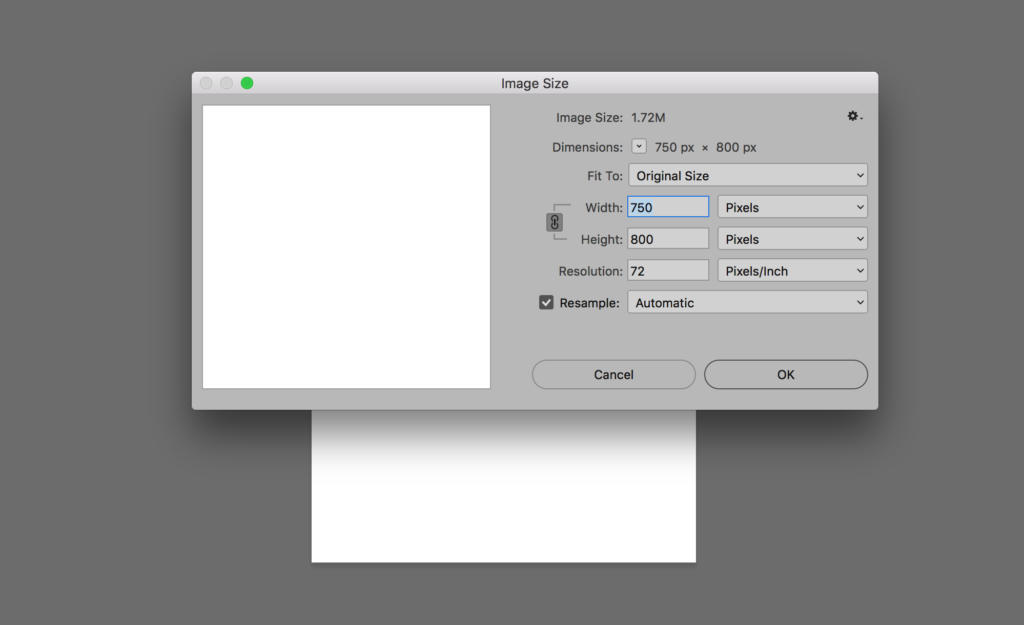
So open Photoshop and create a new file. Make it 750px for the width and 800px for the height and keep the resolution at 72dpi because these are for the web not print. I also made you this template that’s already sized and ready to go with a guide to keep your titles out of the edges.
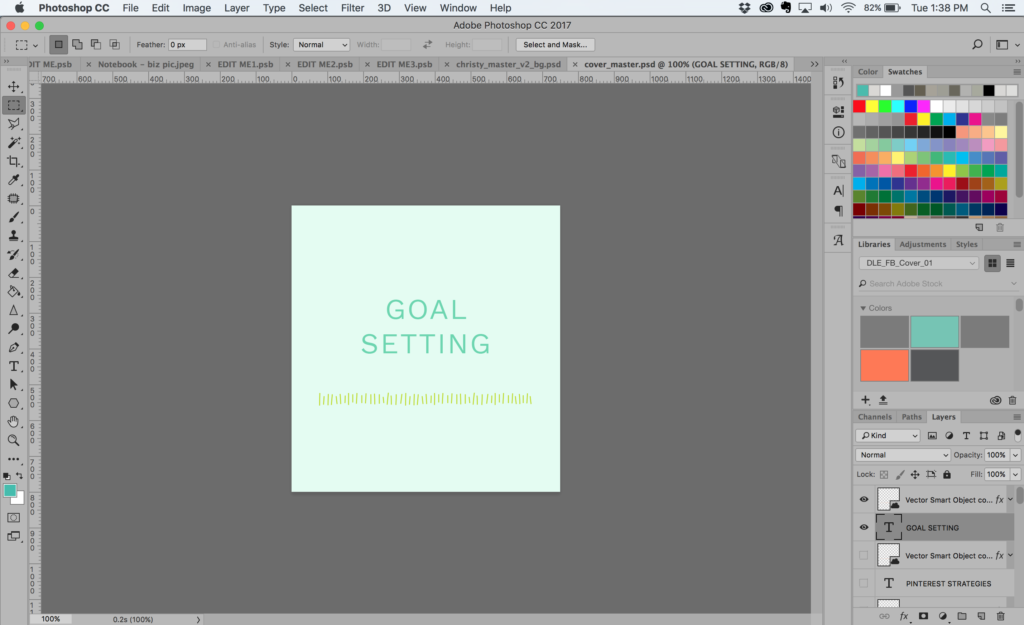
2. Create a simple design that matches your branding.
Now that your file is set up, begin to create your cover. Remember to tie it in to the rest of the branding for your business so that when a visitor finds your Pinterest account and clicks over to your website, the experience is seamless.
You can do this by using your brand colors and fonts and perhaps even a graphic from your style guide. When you’ve finalized your design export it as a PNG. PNGs are not compressed so they don’t pixelate as much as JPGs making your image crisper. Do this by going to File > Export > Export As.
You have more options for changes in this window, but for the most part, the settings that are there already work for this particular graphic. Hit Export all and then name your image to save it.
Create a graphic for each of your boards that matches the board’s title. Make sure your boards are all about content that’s related to your niche and that your board names are easy to understand. Don’t get too creative with your board names. It’s important that your audience knows exactly what your boards are about.
3. Upload your image to Pinterest.
Now that your board covers are ready, sign into your Pinterest account. Here is where it gets a little tedious. When I first did this, I wanted to just go in and do each board, however, I found the following steps to be much better. There’s a method to the madness, I promise!
So first, go into each of your boards to upload your cover image. You’re going to hit the Save a Pin button and a box titled Save from a device will pop up.
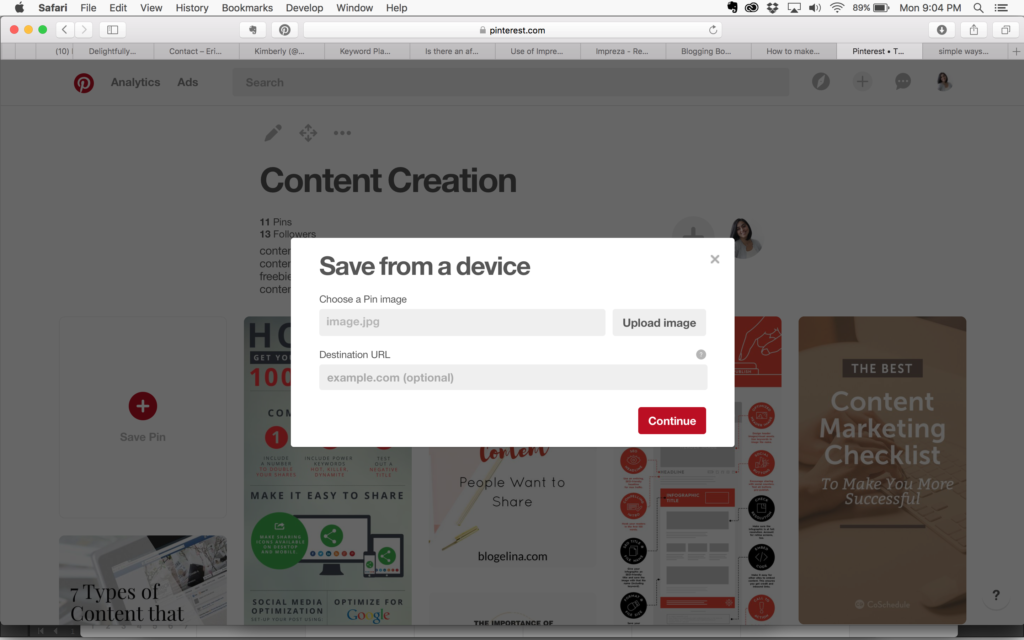
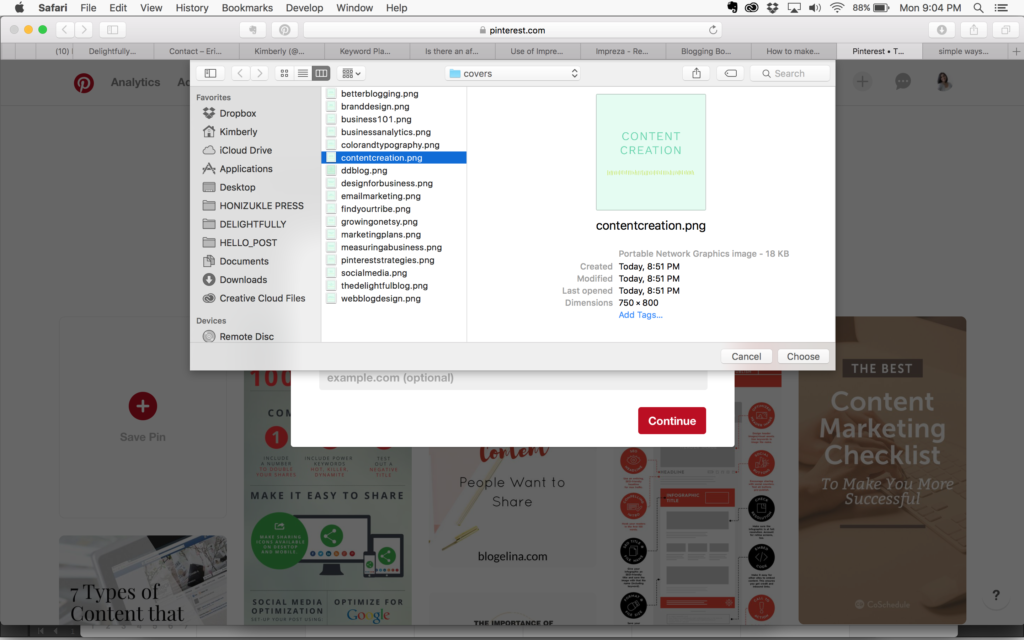
Choose your image from your computer.
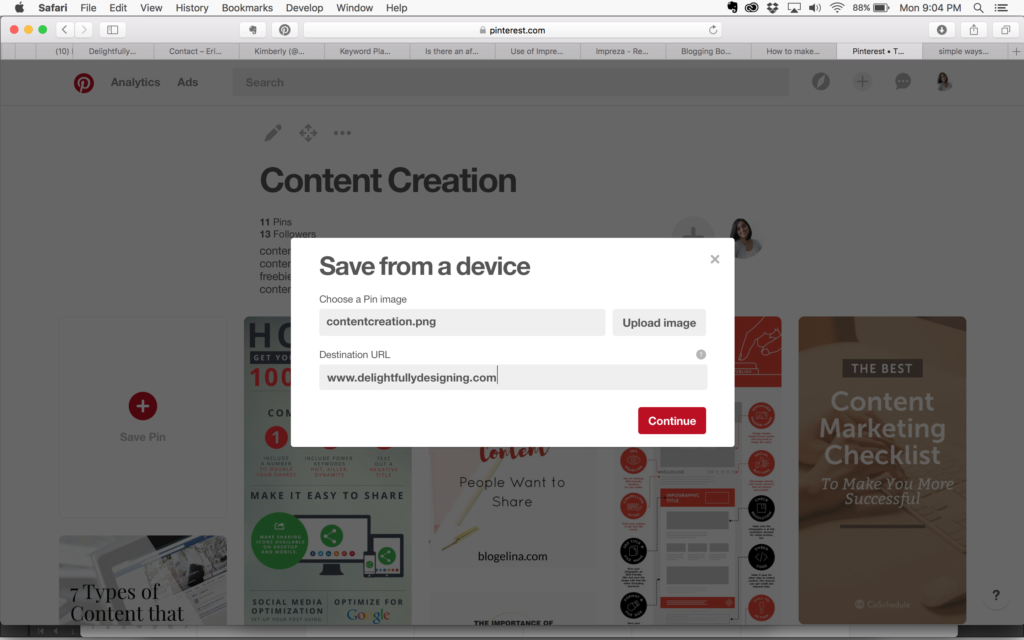
Then add your URL! This image will live in your Pinterest board so you might as well take advantage of this image linking back to your website right?
Now, you might be tempted to go right back out and change the board cover for your board. Don’t do it! I don’t know if this happens to everyone but I started out doing that and every time I went into a different board and uploaded a cover, when I came back out to my profile, the cover I had just done was gone!
It could have been something strange going on at the time but when I did all the image uploads to each board and then went back, everything worked well.
4. Change your board cover.
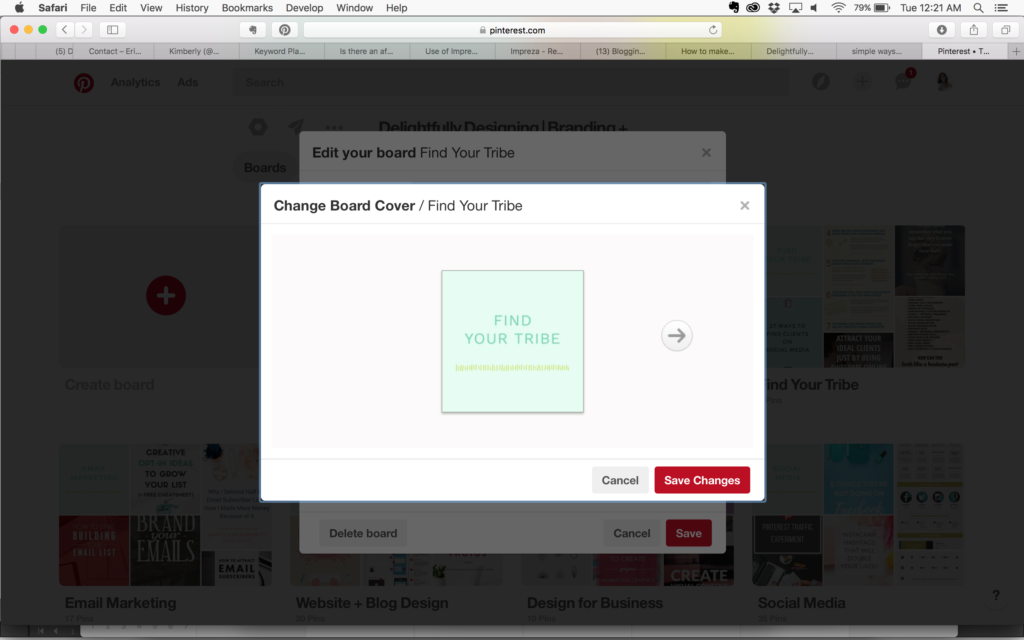
So now that you’ve finished uploading all your covers to their respective boards, head back to your profile. You will now go back in to each board and change the cover. You can do this by simply clicking the EDIT button on the right of each board. That will bring up a window that looks like the image below.
It will have your board name, a description, a category and a button to change the cover. That’s the button you want to hit next.
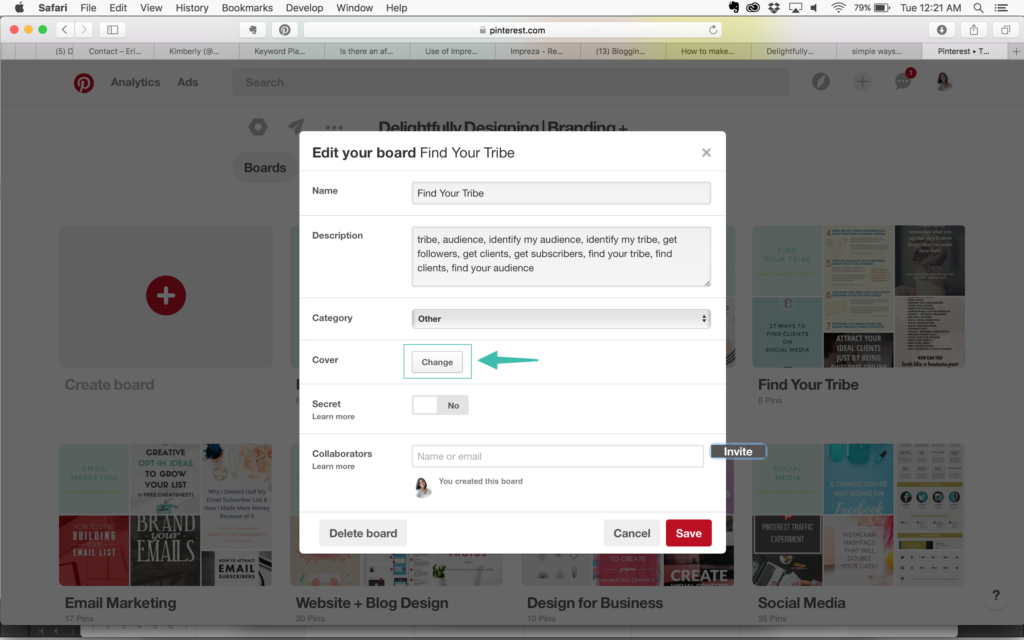
This button will bring up all the images in that particular board. Since you already loaded your cover, simply scroll through and find it. If it’s the last image you put in, it should pop up first.
5. Repeat for all of your boards.
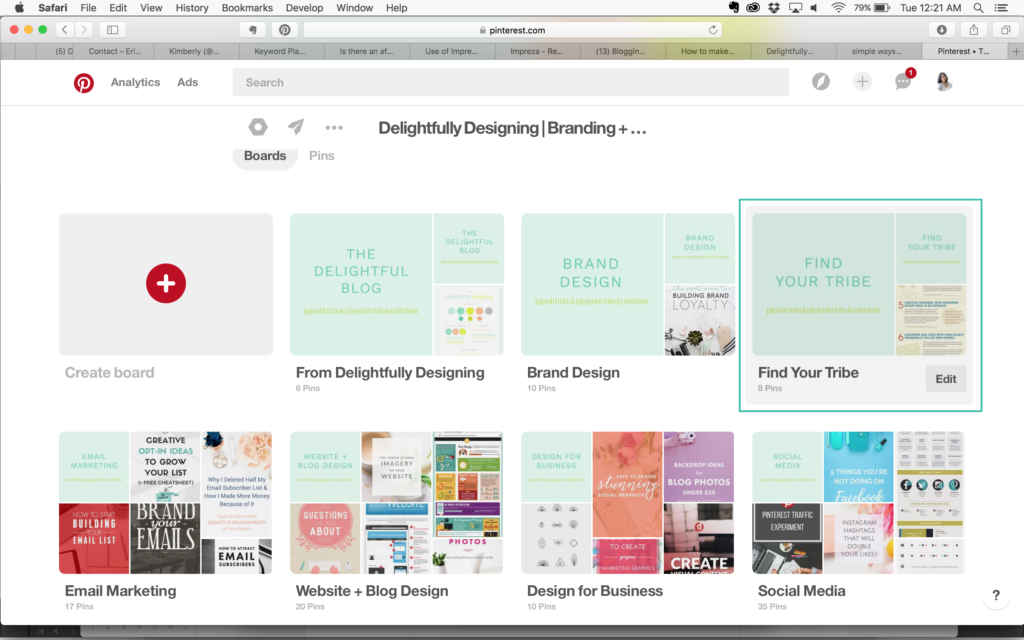
Now all you have to do is repeat this for all of your boards! It can be time consuming, specially if you have a lot of boards to go through. However, when you see how cohesive and branded your profile looks, you’ll see it’s worth it in the end. Here’s an example of 3 boards that I had branded and the others before I changed the cover. As you can see, the top 3 look quite nice together while the others look a little like a jumbled mess. If you want to see a completed profile, have a look at mine here.
So that’s it boys and girls, that’s how you can change your covers and quickly make your Pinterest profile look a lot more professional and cohesive. Don’t forget to download the cover template if you want to just get going quickly.
Till next time,


